

Choosing the right solar power RV kit comes down to matching your daily energy consumption with the system’s wattage output, selecting the correct charge controller type, and ensuring battery compatibility. Most weekend RVers do well with 200-400 watt starter kits, while full-time boondockers typically need 600-1,200 watts to run appliances, lighting, and climate control without relying on shore power or generators.
The RV solar market has matured significantly, giving you access to complete plug-and-play systems that include panels, charge controllers, mounting hardware, and wiring. These kits eliminate the guesswork of component matching while offering better value than piecing together individual parts. However, not all kits serve the same purpose. A basic 100-watt kit might keep your phone charged and run LED lights during a summer camping trip, but it won’t power an air conditioner or residential refrigerator.
Understanding your power needs before shopping saves money and frustration. Calculate your daily watt-hours by listing every device you’ll use, its wattage, and how many hours per day it runs. This number determines your minimum panel wattage and battery capacity. You’ll also need to decide between PWM and MPPT charge controllers, each offering different efficiency levels and price points.
The difference between an adequate system and an excellent one often lies in sizing correctly for worst-case scenarios rather than average conditions. Winter camping, cloudy weather, and power-hungry appliances can quickly drain an undersized setup. This guide walks you through kit categories, helps you calculate your specific requirements, and highlights the most common purchasing mistakes that lead to expensive upgrades down the road.
What Makes a Complete Solar Power RV Kit
A complete solar power RV kit combines multiple components that work together to capture sunlight, convert it to usable electricity, and store energy for when you need it. Understanding what should come in the box helps you spot genuine value and avoid kits that leave you hunting for missing pieces.
At the heart of every system are the solar panels themselves, typically 100 to 400 watts in RV kits, which generate DC electricity when exposed to sunlight. These panels connect to a charge controller, the brain of your system, which regulates voltage and current flowing to your batteries to prevent overcharging and maximize charging efficiency. Quality kits include proper mounting hardware designed for RV roofs, whether that’s Z-brackets for rigid panels or adhesive mounts for flexible options, plus the necessary screws and sealant to create weatherproof installations.
The core components you should expect in a truly complete kit include:
- Solar panels with appropriate wattage for your needs
- Charge controller (PWM or MPPT) to regulate power flow
- Mounting brackets or adhesive hardware for secure installation
- MC4 connectors and correctly-gauged wiring for safe connections
- Battery cables with inline fuses for overcurrent protection
The wiring component deserves attention because undersized cables create voltage drop and efficiency losses. Look for kits with 10 AWG or thicker wire for runs over ten feet, along with proper MC4 connectors that create waterproof panel connections.
Here’s where “complete” gets tricky: most kits don’t include batteries. Manufacturers assume RVers already have house batteries installed, so you’ll typically need to purchase lithium or AGM batteries separately unless the kit explicitly states “battery included.” Some kits also skip inverters, which convert DC power to AC for running standard appliances. If you need to plug in laptops or kitchen devices, verify whether an inverter is bundled or plan to add one.
A partial kit might offer just panels and a controller, leaving you to source mounting gear, wiring, and connectors independently. That approach works for experienced DIYers but creates headaches for beginners who underestimate what they need. The best complete kits arrive with everything except batteries and inverter, letting you start installation immediately without multiple shopping trips or compatibility guesswork.
Types of Solar Power RV Kits Compared
Portable vs. Roof-Mounted Kits
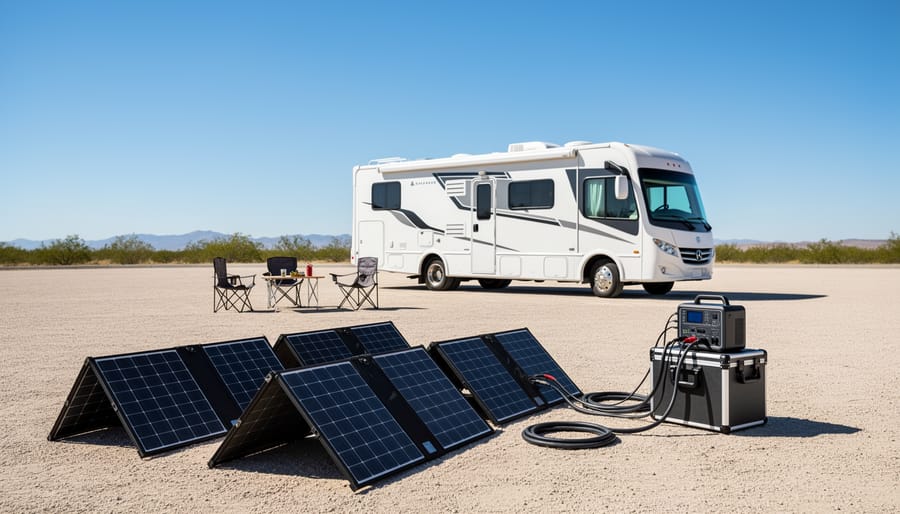
Portable and roof-mounted kits represent fundamentally different approaches to RV solar power, each suited to distinct travel styles. Portable suitcase kits fold open at your campsite, connecting via extension cables to a charge controller inside your RV. This design lets you park in shade while positioning panels in direct sunlight, a significant advantage in forested campgrounds or hot climates where roof heat builds up. You can angle them toward the sun throughout the day for maximum output, and they store inside cabinets when driving, adding zero wind resistance. The downsides? You must deploy and stow them each stop, they’re vulnerable to theft if left unattended, and cable routing through doors or windows can be awkward.
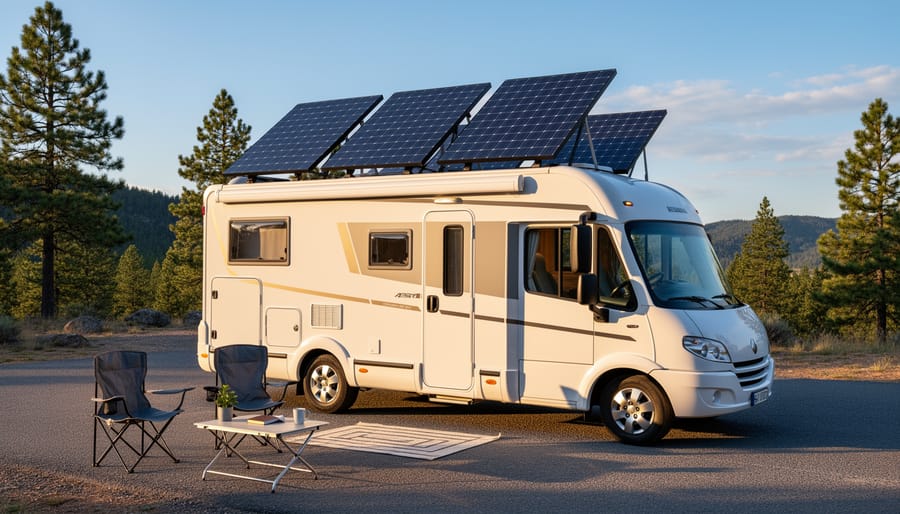
Roof-mounted systems install permanently with brackets and adhesive, turning your RV roof into a fixed power station. Once installed, they’re hands-off, you simply park and the system works, making them ideal for frequent movers or full-timers who value convenience. Roof kits handle highway speeds without concern, can’t be stolen while you’re away from camp, and keep interior storage free. However, you sacrifice the ability to optimize panel angle, lose efficiency when parking in shade, and create a more complex outdoor solar setup requiring roof penetrations for wiring.
Choose portable if you take short trips, camp in varied terrain, or want to test solar before committing. Pick roof-mounted for extended travel, consistent sun exposure, or when you prioritize security and convenience over maximum flexibility.
Starter Kits vs. Expandable Systems
Starter kits typically range from 100 to 200 watts and deliver enough power to keep essential devices charged during weekend trips. A basic 100W kit can run LED lights, charge phones and tablets, and power a 12V fan, perfect if you stick to campgrounds with hookups most of the time but want backup power for occasional boondocking. These entry-level systems cost less upfront and work well for testing whether solar fits your camping style before committing to a larger investment.
Expandable systems start at similar wattage but include compatibility features that let you add panels, batteries, and capacity as your needs grow. The key difference lies in the charge controller: expandable kits use controllers rated for higher amperage than the initial panels produce, leaving headroom for future additions. A 200W starter system with a 30-amp MPPT controller can scale up to 400-500 watts by adding matched panels later. You’ll also find pre-wired junction boxes and parallel connectors that simplify expansion without rewiring your entire setup.
The trade-off centers on immediate cost versus long-term flexibility. If you’re certain your power needs won’t change, maybe you only charge phones and run a water pump, a fixed starter kit saves money. But if you might upgrade to a larger fridge, add a microwave, or transition from weekend warrior to extended off-grid camping, paying slightly more for an expandable system prevents the frustration of replacing components when you outgrow your initial setup.
Rigid Panel Kits vs. Flexible Panel Kits
Rigid panels have dominated RV solar for decades, but flexible panels now offer compelling advantages for certain roofs and weight constraints. The choice impacts your installation options, long-term durability, and overall system performance.
Rigid panels use aluminum frames and tempered glass, making them heavier (typically 35-50 lbs per 200W panel) but more durable. They’re designed to last 25-30 years with minimal efficiency degradation. The glass surface sheds heat better, maintaining higher efficiency in hot conditions, a critical factor when your RV sits in desert sun. Installation requires mounting brackets and drilling into your roof, which some RVers hesitate to do. However, the elevated mounting allows airflow underneath, keeping panels cooler and more efficient.
Flexible panels sacrifice some longevity for versatility. At 5-10 lbs per 200W panel, they’re ideal for RVs with weight restrictions or curved roofs that can’t accommodate rigid frames. You can adhere them directly to the roof with adhesive backing or velcro, avoiding penetrations that might compromise waterproofing. The trade-off? Most flexible panels last 5-10 years before efficiency drops noticeably, and they run hotter against the roof surface, reducing output by 10-15% compared to elevated rigid panels.
Efficiency differs too. Quality rigid monocrystalline panels achieve 19-22% efficiency, while flexible panels typically range 15-18%. For the same wattage rating, you’ll need slightly more roof space with flexible panels. Rigid panels also handle physical stress better, they won’t crack from hail or branches like flexible panels’ plastic coating can.
Consider rigid panels if you plan to keep your RV long-term and have a flat, sturdy roof. Choose flexible if you need lightweight portability, have curved surfaces, or want installation without drilling. Your roof type and travel style matter more than the technology itself.
Critical Factors When Choosing Your RV Solar Kit
Calculating Your Power Requirements
Start by listing every device you’ll actually run in your RV, then multiply the watts each draws by how many hours per day it runs. A typical 12V RV refrigerator pulls about 55 watts but cycles on and off, running roughly 8 hours daily for 440 watt-hours. LED ceiling lights use 10-15 watts each, so five lights for three hours equals 150 watt-hours. Laptops charge at 50-65 watts for two to three hours (100-195 watt-hours), while phone chargers add another 10-20 watt-hours total.
Air conditioning changes the math dramatically. A rooftop AC unit draws 1,200-1,500 watts continuously, requiring 14,400+ watt-hours for 12 hours of runtime, far beyond what most starter kits can deliver. Most weekend campers skip AC on solar or run it only when plugged into shore power. A realistic daily baseline for moderate use (fridge, lights, devices, water pump, furnace fan) typically lands between 800-1,500 watt-hours, which a properly sized 200-400 watt kit with adequate battery storage can handle. Underestimating your real consumption is the fastest route to disappointment, so track a typical day’s usage honestly before choosing panel capacity.
Panel Efficiency and Wattage Output
Panel wattage ratings on the box represent ideal laboratory conditions, 25°C temperature, perfect sun angle, zero shade, that rarely exist in real RV camping. Monocrystalline panels typically achieve 18-22% efficiency, converting more sunlight per square foot than polycrystalline panels at 15-17%, which matters when roof space is limited. A 200W monocrystalline panel might actually produce 140-160W during midday summer travel, dropping to 60-80W on overcast days or when parked at suboptimal angles.
Temperature dramatically impacts output; panels lose roughly 0.5% efficiency per degree above 25°C, meaning your roof-mounted array can underperform by 10-15% on hot summer days when you need air conditioning most. Panel angle also affects harvest, flat-mounted panels sacrifice 20-30% potential output compared to tilt-adjustable setups that track the sun’s arc.
Understanding these real-world limitations shapes smart solar system selection. Calculate your daily power needs, then oversize your panel array by 25-30% to account for efficiency losses, weather variability, and winter’s shorter, lower-angle sunlight. A kit rated at 400W should be considered a 280-320W system for realistic trip planning.
Charge Controller Technology: PWM vs. MPPT
The charge controller regulates current from your panels to your batteries, preventing overcharging and ensuring safe operation. Two technologies dominate the market: Pulse Width Modulation (PWM) and Maximum Power Point Tracking (MPPT).
PWM controllers are the simpler, more affordable option, typically costing $30 to $100. They work by matching panel voltage directly to battery voltage, essentially “pulling down” panel output to battery level. This makes them straightforward and reliable, but they waste potential power, especially when panel voltage significantly exceeds battery voltage. PWM controllers make sense for smaller systems under 200 watts where the cost difference outweighs efficiency concerns.
MPPT controllers are smarter and more efficient, converting excess voltage into additional amperage. This harvesting technology can capture 20 to 30 percent more power from the same panels compared to PWM, particularly in cold weather or low-light conditions. The MPPT vs PWM efficiency advantage becomes significant in larger systems. Expect to pay $150 to $400, but the investment pays off faster as system size grows.
For kits above 300 watts or if you plan to expand later, MPPT delivers better long-term value despite higher upfront cost. Budget-conscious buyers with modest power needs can safely choose PWM without sacrificing reliability.
Battery Compatibility and Storage Capacity
Your RV solar kit’s battery bank determines whether you have power when the sun isn’t shining. Most kits either include batteries or require you to purchase them separately, check carefully before buying, as batteries often represent the largest single cost in your system.
Lithium (LiFePO4) batteries have become the gold standard for RV solar installations. They’re lighter, charge faster, and provide usable capacity down to 80-90% of their rated amp-hours without damage. A 200Ah lithium battery delivers roughly 2,400 usable watt-hours. AGM batteries cost less upfront but only safely discharge to about 50% capacity, meaning that same 200Ah rating yields just 1,200 usable watt-hours. For weekend trips, AGM batteries work fine. Full-timers benefit from lithium’s longevity, 10+ years versus 3-5 for AGM.
Calculate your overnight needs by totaling watt-hours consumed between sunset and sunrise. Add 20-30% buffer for cloudy days. A couple running LED lights, a 12V fridge, and charging phones overnight typically needs 100-150Ah of usable capacity. Verify your chosen kit’s charge controller supports your battery chemistry, some older PWM controllers don’t properly charge lithium banks.
Top Solar Power RV Kit Recommendations for 2026
Best Budget-Friendly Starter Kit
The Renogy 100W 12V Solar Starter Kit consistently delivers the best value for weekend warriors and occasional RVers working with tight budgets. Priced around $150-$200, this entry-level system includes a 100-watt monocrystalline panel, PWM charge controller, mounting brackets, and basic wiring, everything needed to keep your battery topped up during short trips.
This wattage realistically powers LED lighting, phone charging, a 12V fan, and occasional laptop use, but won’t run air conditioning or microwaves. The PWM controller costs less than MPPT but sacrifices 20-30% efficiency in less-than-ideal conditions. Panel quality remains solid despite the budget price, though the included cables run shorter than premium kits and you’ll need to purchase batteries separately.
For someone camping a few weekends per month without heavy power demands, this kit proves sufficient. You’re trading expandability and advanced features for immediate affordability, adding panels later requires purchasing additional controllers rather than simply connecting to a modular system.
Best Mid-Range Expandable System
For RVers committed to extended trips who anticipate growing power needs, the Renogy 400W Premium Kit strikes an excellent balance between initial investment and long-term capability. Priced around $1,200-$1,400, this system delivers four 100W monocrystalline panels, a 40A MPPT charge controller with Bluetooth monitoring, and pre-wired harnesses that simplify adding panels later, you can expand to 800W without replacing the controller.
What sets this kit apart is the quality-per-dollar ratio: marine-grade wiring, corrosion-resistant Z-brackets for various roof types, and a controller that extracts 20-30% more energy than PWM alternatives. Users consistently praise the straightforward expansion process; adding two more panels typically takes under an hour. The system handles refrigerators, laptops, LED lighting, and water pumps comfortably, with headroom for future devices like inverters or air conditioning boosters as your off-grid ambitions grow.
Best Portable Solar Kit for Flexibility
The Jackery SolarSaga 200W Portable Kit stands out as the flexibility champion for RVers who value adaptability over permanent installation. This suitcase-style system folds into a compact 24×21-inch case that weighs just 27 pounds, making it easy to reposition throughout the day for optimal sun exposure or move between your RV, boat, and home emergency setup.
What sets this kit apart is its plug-and-play simplicity. The integrated kickstand deploys in seconds, and the MC4 connectors attach to most portable power stations without tools. The bifacial panels capture reflected light from below, boosting output by up to 25% on light-colored surfaces. Real users report generating 180-200 watts in ideal conditions, enough to recharge a typical 500Wh power station in three to four hours.
The kit’s true advantage emerges in campground scenarios where roof shade is unavoidable. Unlike fixed installations, you can set this system in a sunny clearing 20 feet away while your RV stays under trees. Storage is equally practical, it slides under beds or in exterior compartments without requiring permanent roof penetrations that could compromise your vehicle’s warranty or resale value.
Best Premium All-Inclusive System

For full-timers and serious off-grid enthusiasts, the Renogy 800W Premium Solar Kit with Smart Lithium Battery Integration stands out as the comprehensive powerhouse worth the investment. This system delivers genuine off-grid independence with four 200W monocrystalline panels featuring some of the best solar panel 2026 efficiency ratings at 23%, a 40A MPPT charge controller with Bluetooth monitoring, 400Ah lithium battery bank, and professional-grade wiring with MC4 connectors throughout.
What justifies the premium price is the complete integration, every component is sized to work together optimally, eliminating guesswork and compatibility issues. The kit handles power-hungry appliances like residential refrigerators and air conditioners that smaller systems can’t touch. Users consistently highlight the robust build quality, with heavy-duty aluminum mounting rails that withstand highway speeds and harsh weather without flexing.
The included battery management system extends lithium battery life through precise charging algorithms, while the smart monitoring lets you track production and consumption from your phone. Real-world testing shows this setup maintains full battery charge even during three consecutive cloudy days with moderate use, the kind of reliability full-timers need when dry camping for extended periods.
Common Mistakes to Avoid When Buying an RV Solar Kit
The biggest regrets RV solar buyers share in forums and product reviews stem from rushing the purchase without considering how they’ll actually use their system. These mistakes are preventable with upfront planning, and recognizing them now saves you from expensive do-overs later.
- Underestimating power needs: Buyers often calculate only basic lighting and phone charging, forgetting about refrigerator cycling, water pump runtime, and occasional laptop use. Track your actual consumption for a weekend trip before sizing your kit, and add 20% buffer for unexpected draws.
- Choosing the cheapest kit without checking component quality: Bargain systems frequently skimp on charge controllers (basic PWM instead of efficient MPPT) or use low-grade panels that degrade quickly. Read detailed reviews focusing on long-term performance, not just initial price.
- Ignoring roof space and weight limits: A 400W kit sounds great until you realize your RV roof can’t physically accommodate four 100W panels around vents and AC units. Measure available roof area and check your RV’s weight capacity before ordering.
- Buying panels without considering battery capacity: Your panels can only charge what your battery bank can store. A 300W panel paired with a single 100Ah battery creates charging inefficiency and wasted solar potential during peak sun hours.
- Overlooking expandability: Starting with a non-expandable kit means replacing the entire system when needs grow, whereas modular systems with extra controller capacity let you add panels later. Consider your three-year outlook, not just immediate needs.
- Skipping professional installation for complex setups: While basic kits work for DIY, running wiring through roof penetrations or integrating with existing electrical systems requires expertise. Improper solar panel installation can void warranties and create safety hazards.
- Forgetting about shade and positioning: Roof-mounted panels work poorly when trees, slide-outs, or air conditioners cast shadows for much of the day. Portable kits offer positioning flexibility that fixed installations can’t match in heavily shaded campsites.
The most expensive mistake is treating solar kits as plug-and-play appliances rather than integrated systems. Your panels, controller, batteries, and inverter must work together efficiently, which means matching voltage specifications and ensuring wire gauge handles your amperage. Mismatched components create bottlenecks where your weakest link determines overall performance, regardless of how premium your panels are. Take time to understand how each piece functions within the whole system before clicking purchase.
Installation Considerations and Professional Help
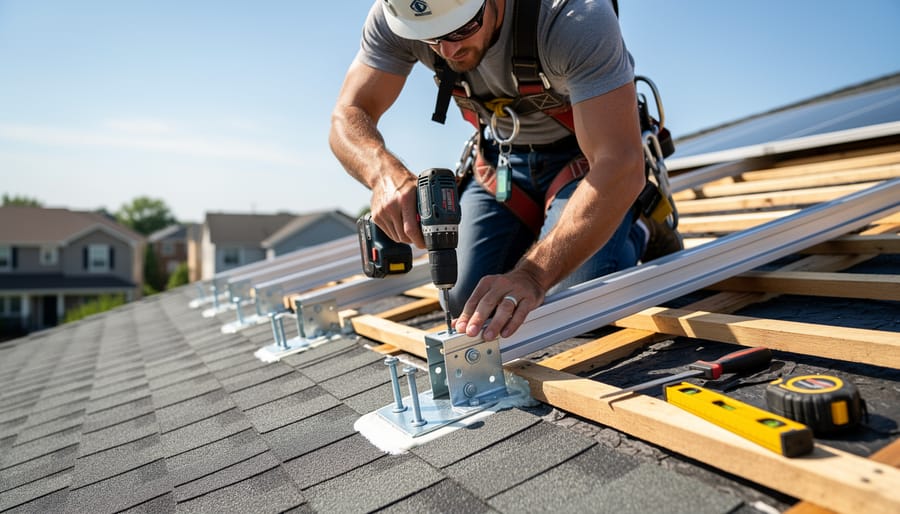
Most RV solar kits land somewhere between plug-and-play simple and genuinely challenging. Portable suitcase kits require zero installation, unfold, connect to your battery, done. Roof-mounted systems demand more effort but remain DIY-friendly if you’re comfortable working at height with basic tools.
For a typical roof-mounted kit, you’ll need a drill, screwdrivers, wire strippers, crimpers, and sealant for penetrations. The real skill barrier isn’t wiring complexity, most kits use color-coded MC4 connectors that snap together, but rather drilling through your RV roof without creating future leaks. Following panel mounting tips helps, but sealing those holes properly matters more than perfect panel placement.
Budget four to eight hours for a first-time DIY installation of a 400W system. The physical mounting takes longest; electrical connections go surprisingly fast with pre-wired components. Manufacturers design kits assuming basic handyman skills, not electrical engineering degrees.
Consider professional installation if you’re uncomfortable on your roof, uncertain about electrical connections, or want warranty protection. Many manufacturers void coverage if improper DIY installation causes component failure, though normal self-installation following instructions typically preserves your warranty. Check your specific kit’s terms.
Professional installation costs between $300 and $800 depending on system complexity and local rates. Mobile RV solar installers charge toward the lower end; dealership service departments hit the higher range. That added expense buys peace of mind, proper weatherproofing, and someone to blame if problems arise.
Expandable systems complicate the decision. Installing the starter kit yourself makes sense, then hiring help when adding panels involves running new conduit or upgrading the charge controller. Match your approach to your comfort level, not just your budget.
Frequently Asked Questions About Solar Power RV Kits
Can a solar kit run my RV air conditioner?
Most standard RV solar kits can’t run a roof air conditioner, which typically draws 1,200-1,800 watts on startup. You’d need a premium 800W+ system with substantial lithium battery storage to handle AC, though some newer inverter ACs work with 400-600W systems during mild conditions.
How long do solar power RV kits typically last?
Quality panels carry 25-year warranties and often last 30+ years with gradually decreasing efficiency. Charge controllers typically last 10-15 years, while batteries are the limiting factor, lithium batteries last 10-15 years and AGM batteries 3-7 years depending on usage depth and maintenance.
Can I expand my solar kit later if my power needs increase?
Expandable systems let you add panels as long as your charge controller can handle the additional wattage and your battery bank matches the increased charging capacity. Check the controller’s maximum input rating and ensure your roof has space before purchasing a starter kit you plan to grow.
What maintenance do solar RV kits require?
Maintenance is minimal, clean panels every few months to remove dirt and debris that reduce efficiency, check wiring connections annually for corrosion, and monitor battery water levels if using flooded lead-acid batteries. Most systems are essentially set-and-forget once properly installed.
Will solar kits work effectively in cloudy or northern climates?
Solar panels still generate power on overcast days, though output drops to 10-25% of full sun capacity. In frequently cloudy regions, oversize your panel array by 50-100% and increase battery storage to capture energy during sunny breaks and carry you through gray periods.
How long does it take to recoup the investment in an RV solar kit?
Payback periods vary widely based on camping frequency and habits. Full-timers avoiding campground electric hookups can recover costs in 2-4 years through saved site fees, while weekend warriors who occasionally dry camp might see 5-8 year payback primarily through eliminated generator fuel costs.
Can I install a solar kit on any RV roof type?
Most kits work on standard RV roofs, but installation methods differ. Rubber roofs need sealant and mounting feet that distribute weight, fiberglass roofs allow direct drilling with proper sealing, and aluminum roofs may require specialized brackets. Flexible panels adapt to curved surfaces that rigid panels can’t accommodate.
Do I need to disconnect my solar panels when storing my RV?
No need to disconnect, solar panels actually help during storage by maintaining battery charge and preventing sulfation in lead-acid batteries. Just ensure your charge controller has proper low-voltage disconnect protection to prevent over-discharge if the RV sits unused for extended periods.
Beyond these common questions, many RVers wonder about compatibility with existing electrical systems. Solar kits integrate seamlessly with shore power and generators through your RV’s existing battery charging system. The solar charge controller simply becomes another charging source alongside your converter and alternator, with no special switching required.
Another practical concern involves winter performance. Snow covering panels obviously stops production, but cold temperatures actually improve panel efficiency compared to hot summer days. If you winter camp in snowy regions, roof-mounted panels positioned at an angle shed snow better than flat installations, and a quick brush-off after storms restores full output.
Insurance and warranty considerations matter too. Most RV insurance policies cover properly installed solar equipment as part of the vehicle, though you should verify coverage limits for premium systems. Component warranties vary, reputable manufacturers back panels for 25 years, electronics for 2-5 years, and batteries according to type and brand. Keep installation receipts and register products promptly to protect these warranties.
Choosing the right solar power RV kit isn’t about finding a one-size-fits-all solution. It comes down to honestly assessing how you use your RV, what devices you can’t live without, and what you’re willing to invest. A weekend warrior running lights and charging phones has entirely different needs than a full-timer powering a refrigerator and laptop daily. Start with your power calculation. Know your daily watt-hour consumption before you compare kits, because buying too small means constant battery anxiety, while oversizing wastes money on capacity you’ll never use.
The freedom solar power delivers goes beyond cutting campground fees. You’re reducing your carbon footprint with every sunny day, tapping into clean energy that doesn’t pollute or make noise. You’ll access remote locations without sacrificing modern conveniences, and you’ll stop worrying whether your batteries will last through the night. That independence transforms how you travel.
Focus on the factors we’ve covered: kit type matching your setup, efficiency numbers that reflect real-world conditions, controller technology appropriate for your wattage, and battery compatibility that supports your camping style. Read user experiences, not just manufacturer specs. Quality components cost more upfront but deliver reliable power for years, while cheap kits often leave owners upgrading within months. Your perfect kit exists, you just need to match it to your actual needs rather than aspirational ones.


How to Choose Flexible Solar Panels for RVs: A Buying Guide
Choosing the right solar power RV kit comes down to matching your daily energy consumption with the system’s wattage output, selecting the correct charge controller type, and ensuring battery compatibility. Most weekend RVers do well with 200-400 watt starter kits, while full-time boondockers typically need 600-1,200 watts to run appliances, lighting, and climate control without relying on shore power or generators. The RV solar market has matured significantly, giving you access to complete plug-and-play systems that include panels, charge controllers, mounting hardware, and wiring. These kits eliminate the guesswork of ...